While seeing the name “Jira” for the very first time, an acquaintance took it for an ancient animated villain. Well, it is not. In fact, Jira is a project management tool. From planning and tracking to managing the workflow, Jira is designed to help teams and enterprises alike.
But the question is how to use Jira? And that too efficiently? Well, no biggie because we are going to teach you step by step about Jira; from setting it up to integrating it with other similar tools.
Who Uses Jira: A brief Overview
For context, Jira is pretty popular among multiple industries. Gone are the days when teams had to rely on manual management of tasks or projects. Software developers, agile teams, project managers and IT service provider teams use Jira to turn complex tracking of projects into simple ones.
So, are you feeling anxious for not meeting the deadlines and are facing difficulty in managing projects in a structured way? If yes, this text is for you. In fact, it is for everybody out there who is facing the same spectrum.
Key Uses of Jira
Jira is popular for a reason. Across industries, it is adopted as a pivoting medium to track, organize, monitor and manage projects and tasks. Some benefits are listed below:
- Ability to find and track issues in any given process
- Ingrained set of frameworks like Scrum and Kanban for sprint planning
- Workflow automation
- Third party integration
- Scalability and
- Agile support
Jira vs Other Project Management Tools
- Jira includes all the famous agile frameworks as Kanban, Scrum and SAFe while Trello and Asana includes Kanban and basic task and timeline views respectively.
- Jira is highly customizable while Trello has limited power ups and Asana is moderate in nature.
- Jira is best recommended for developer teams and enterprises while Trello and Asana are good for lightweight tasks or managing simple team tasks.
- Jira’s integration system is strong and includes Bitbucket, Confluence, GitHub, etc. On the other hand, Trello and Asana have basic to good integration ecosystems.
Prerequisites Before Getting Started
Before getting started, you must create an account on Jira. Doing that will allow you to choose the right product. Stating this because Jira varies in product including software, work management and service management.
The moment you sign up at Atlassian, it will show Jira plans that will further clear your ambiguities.
7 Steps to Get Started
Let’s move forward to the gist of this blog, in essence, setting up Jira and integrating it with other tools.
Step 1: Setting up a Jira Account
The first big thing is how to get Jira and set it up. For the record, Jira is free to use and download. Difference lies in choosing the version. So, here are some simple steps to let it done.
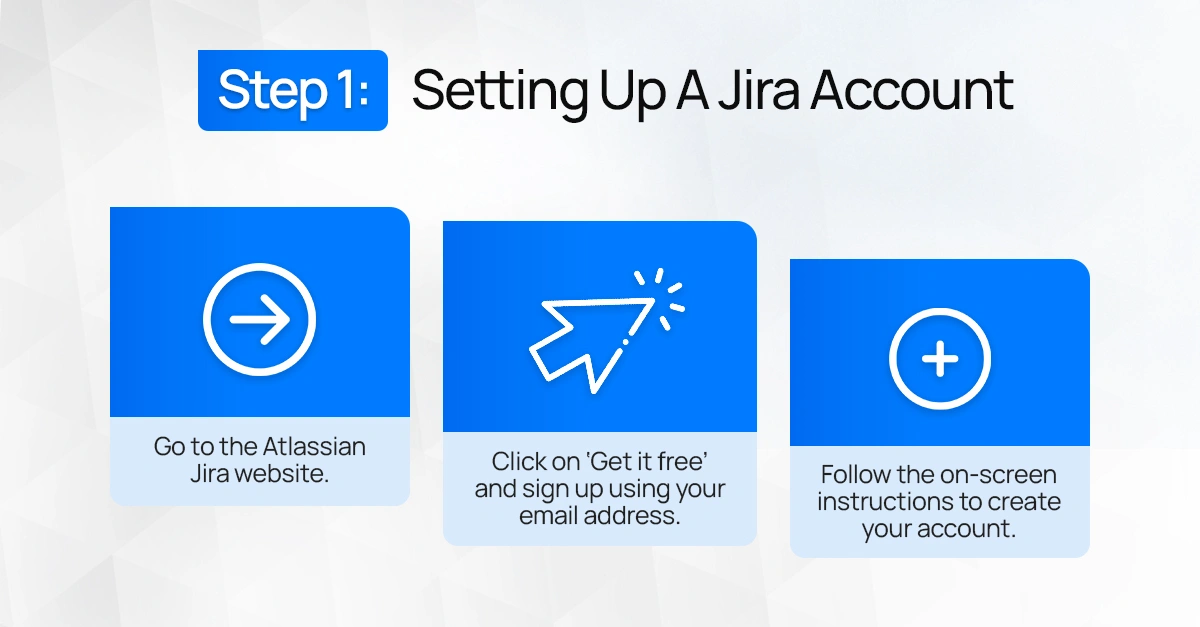
- Go to www.atlassian.com/software/jira
- Click on Try it free
- Signup with your Google Account or the Microsoft one
- Choose either free plan or paid
- After signing up, you will directed to the Jira website
Step 2: Creating a Project
A project is a collection of tasks that need to be completed to achieve a certain outcome. Now that you’ve logged in, click 'Create Project' from the Jira Dashboard. You can choose from several templates available depending on your workflow, such as:
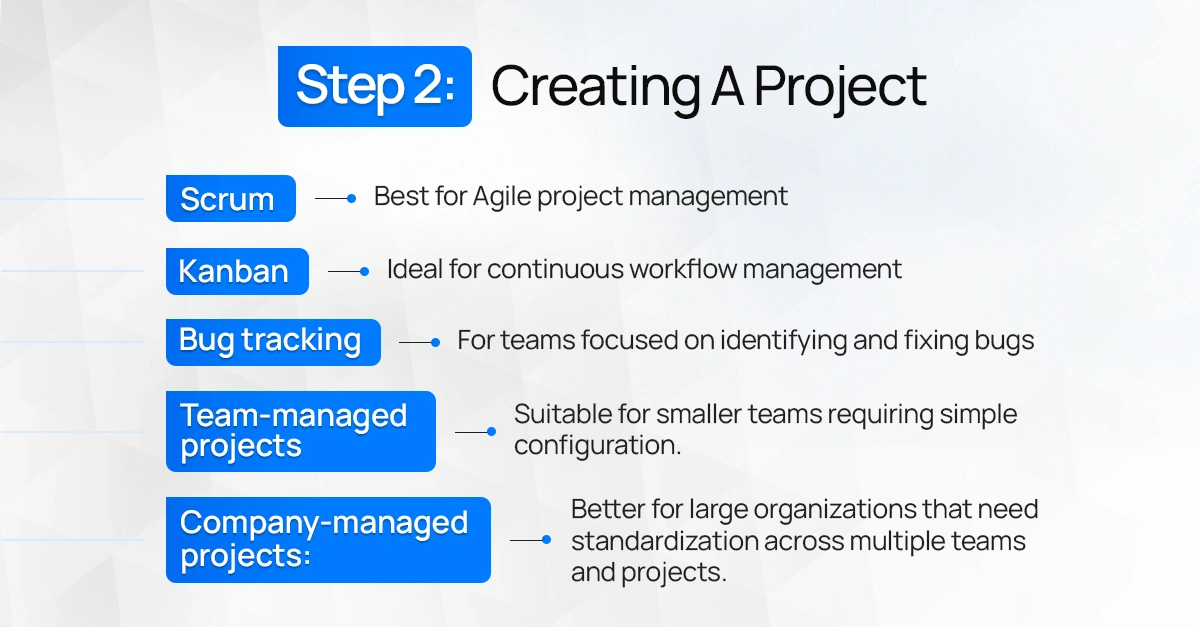
- Scrum (best for Agile project management)
- Kanban (ideal for continuous workflow management)
- Bug tracking (for teams focused on identifying and fixing bugs)
Once you have selected your project template, you’ll have to choose between two project types:
- Team-managed projects: Suitable for smaller teams requiring simple configuration.
- Company-managed projects: Better for large organizations that need standardization across multiple teams and projects.
From there, name your project, set privacy settings, and click submit. Once your project is created, let’s move on to understanding Jira basics. Remember, you can always customize your project later.
Step 3: Understanding the Jira Interface
Whether it's a small or a big project, Jira provides the necessary features to manage your work. But before you begin, take a moment to explore the Jira interface, which includes:
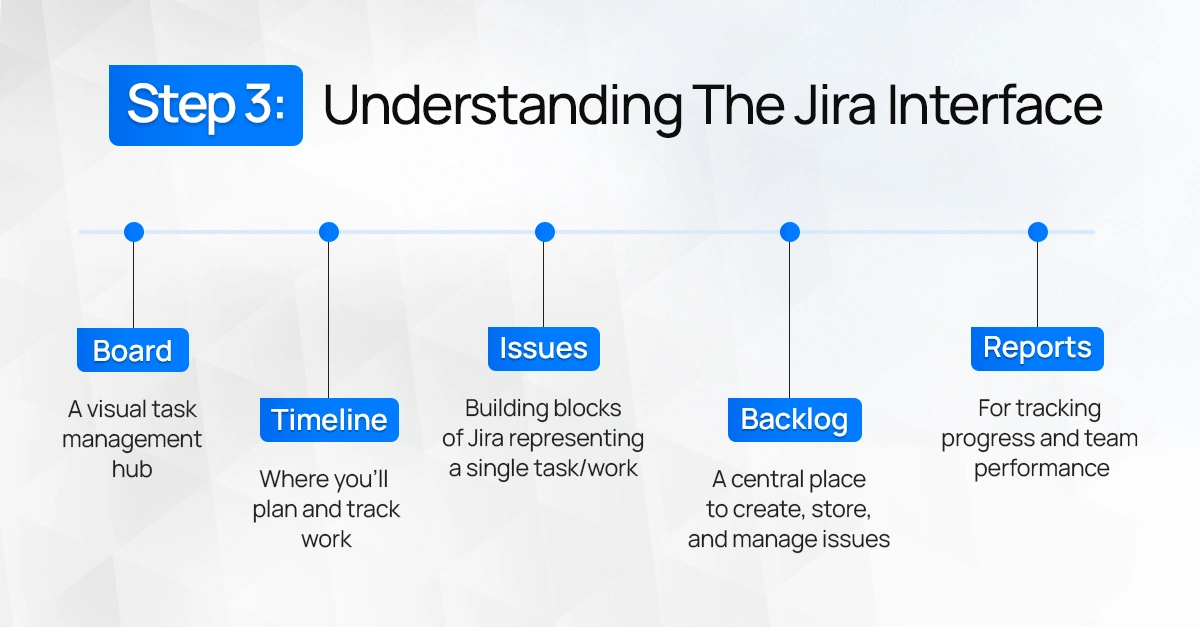
- Board: A visual task management hub
- Timeline: where you’ll plan and track work
- Issues: building blocks of Jira representing a single task/work
- Backlog: a central place to create, store, and manage issues
- Reports: for tracking progress and team performance
Step 4: Creating an Issue
Jira makes it pretty easy to identify, categorize, and distinguish between different types of work using issues. The “Issues” tab is where you’ll be spending most of your time, so get comfortable with it.
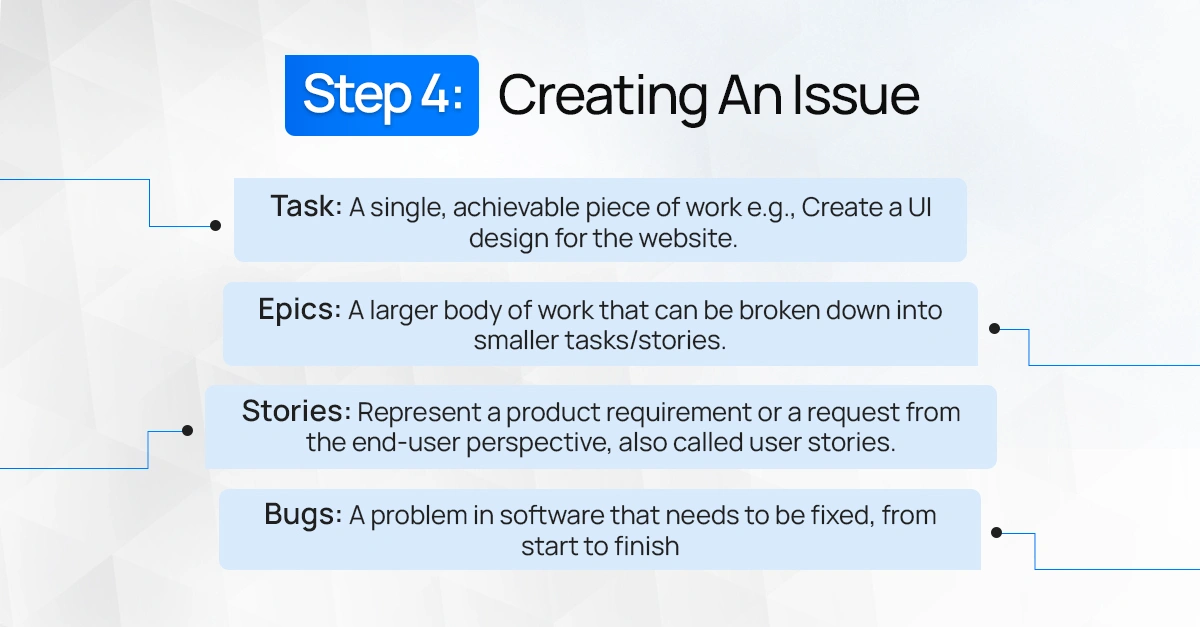
In order to create an issue in Jira, click “Create” in the top navigation panel. Next, choose any of the following issue types depending on your project:
- Task: a single, achievable piece of work e.g., creating a UI design for the website.
- Epics: a larger body of work that can be broken down into smaller tasks/stories.
- Stories: represent a product requirement or a request from the end-user perspective, also called user stories.
- Bugs: a problem in software that needs to be fixed, from start to finish.
Fill in the summary box and provide information in the relevant issue fields. You can also assign the task to a team member, and set task priority, and due dates. Once you create an issue, your ‘new’ task will appear in the backlog or board of your project depending on your project template.
Step 5: Setting up the Workflow
The path your project takes from creation to completion is called a workflow. Each workflow in Jira consists of a set of statuses and transitions that your issue moves through during its life cycle, (To-do→In progress→Done). The “Board” displays all the issues in columns. You can easily update your workflow by adding and rearranging “issues” in the respective columns directly on the board.
Users can click the (+) button to add another step in the workflow (e.g., To-do→In progress→Testing→Done). Moreover, you can use the workflow editor to create, visualize, or edit the steps and transitions of the workflow.
Step 6: Creating Reports and Tracking Progress
Jira has powerful reporting features to help you manage project progress and drive data-driven decision-making. For context, Jira includes different types of reports:
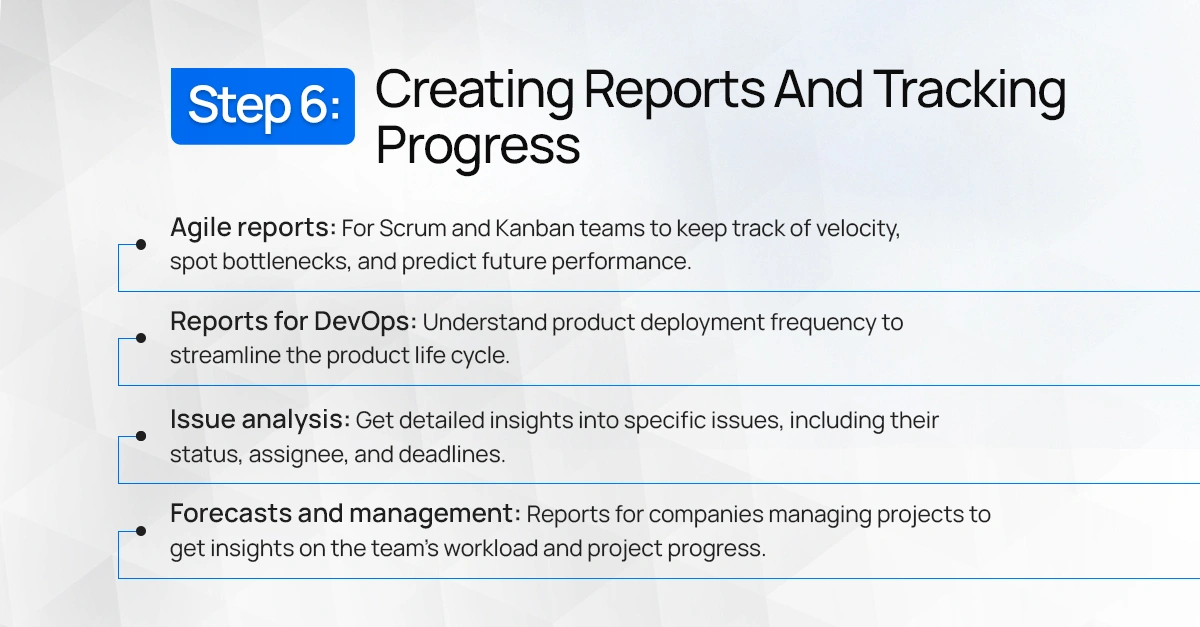
- Agile reports: For Scrum and Kanban teams to keep track of velocity, spot bottlenecks, and predict future performance.
- Reports for DevOps: Understand product deployment frequency to streamline the product life cycle.
- Issue analysis: Get detailed insights into specific issues, including their status, assignee, and deadlines.
- Forecasts and management: Reports for companies managing projects to get insights on the team’s workload and project progress.
Open project settings in Jira, select “Features” and click on the “Report” tab to choose among reports such as:
- Burndown chart
- Burnup chart
- Control chart
- Velocity chart
- Epic reports
- Cumulative flow diagram
- Average age report
- Sprint report, and more!
Step 7: Integrating Jira with Other Tools
Once your Jira project is set up, it’s time to build great software. Jira allows for integration and automation to enhance productivity, save time, and reduce manual efforts. Whether you are managing a design, IT, business, or software engineering team, simply use the add-on feature to connect Jira with various tools, including:
- Confluence
- Figma
- Trello
- Slack
- Zendesk
- Microsoft tools
- Github
- Asana
- and more!
Frequently Asked Questions
Is Jira Free?
Yes, Jira has a free plan of up to 10 users and a 2 GB storage limit. However, paid plans are available for more advanced tools and larger teams.
Who Uses Jira?
Jira is widely used across various teams, including:
- Software development teams
- Project management teams
- Agile teams
- Bug tracking teams
- IT teams
- HR departments
- Operations
- Marketing
How quickly can I learn Jira?
You can learn Jira basics in a few hours; however, mastering advanced features may take a few weeks with practice.
What are the Key Features of Jira?
Jira provides the following features to plan, support, and manage workflows:
- Agile development
- Dashboards
- Reporting
- Rich APIs
- Time tracking
- Customization
- Security and privacy controls
- Integrations
- Mobile app
What are the limitations to consider with Jira?
Here are a few limitations of using Jira:
- Complex interface
- Can be expensive for larger teams
- Not suitable for non-agile teams
- Partial support in project automation
- Migrating projects is time-consuming
- Limited features in team-managed projects
Final Thoughts
Jira is a powerful tool that can transform how teams plan, track, and manage projects. This Jira user guide outlined 7 steps to using Jira, creating projects, managing workflows, and exploring useful features such as reporting and integration. While Jira may seem complex at first, with practice and dedication, teams can perform effective project management through Jira.
Get in touch with Red Star Technologies to streamline your project management with Jira. Contact our tech team at sales@redstartechs.com today.


 September 12, 2025